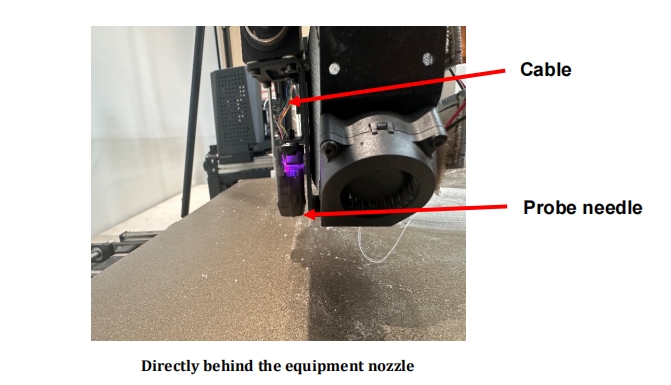
Check the CR-TOUCH working status, If the indicator light is purple, It is normal, If it is flashing red, It means the work is abnormal, First, try shooting down and then re-plugging and unplugging the CR-TOUCH cable and manually pulling out the probe needle several times, Turn on and check whether it return to normal, If not, it needs to replace new CR-TOUCH.
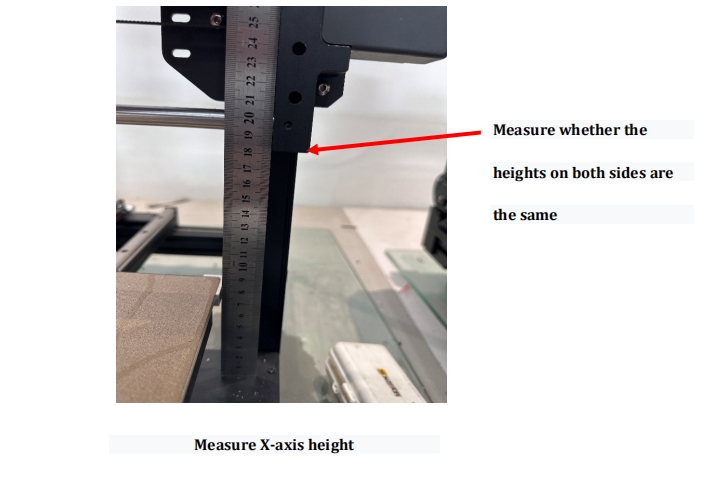
Check whether the heights on both sides of the X-axis are consistent. First, use measuring tool to measure whether the height form both sides of the X-axis to the heating bed is consistent, If it is inconsistent, you need adjust the X-axis on one side(contact the after-sales personnel to obtain the operation video).
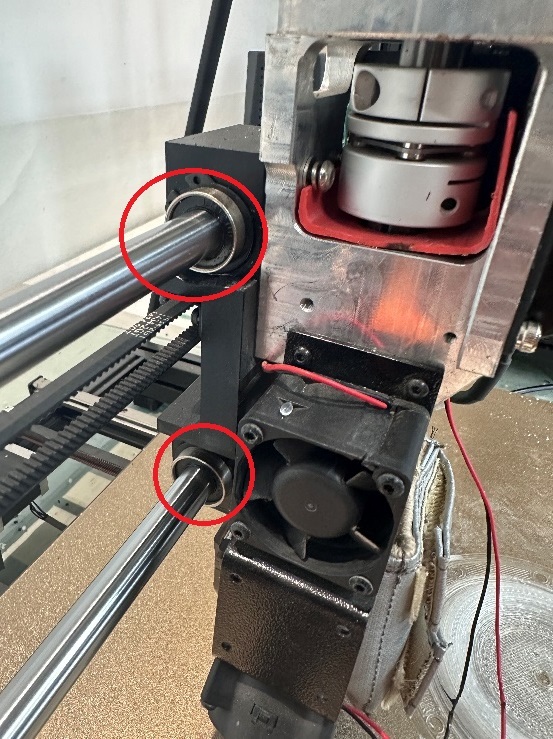
Check whether the print head is firmly fixed. Try shaking the print head with your hands if it becomes loose, it is necessary to check whether the fixed bearing connecting the print head and X-axis is abnormal.
Machine firmware problem, please contact after-sales personnel to obtain the latest firmware.
When the machine is reset to zero, home failed is displayed.
Check the CR-TOUCH working status, If the indicator light is purple, It is normal, If it is flashing red, It means the work is abnormal. First, try shooting down and then re-plugging and unplugging the CR-TOUCH cable and manually pulling out the probe needle several times, Turn on and check whether it return to normal, If not, it needs to replace new CR-TOUCH.
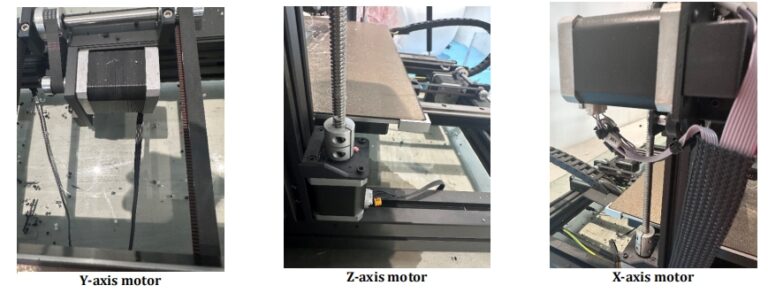
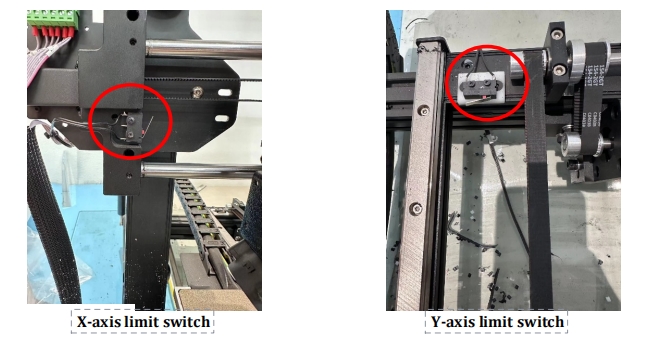
When returning to zero, check with axis cannot move, check the motor wire of that axis and re-plug it.
When returning to zero, check which axis cannot move, check the limit switch wire of the axis and re-plug it.(CR-touch is the Z-axis limit)
Sensor Error During Preheating.
Try preheating the nozzle individually. If the preheating nozzle reports an error. Check whether the whether the nozzle displays room temperature on the screen, if room temperature is displayed, it means the heating rod cable is in poor connect and need check it: if room temperature is not displayed, it means need to check the nozzle temperature sensor.
Try preheating the bed separately. If an error occurs when preheating the heated bed check whether the heated bed displays room temperature on the screen. If the room temperature is displayed, it means there is an problem with the heating cable of the heated bed, if there is no room temperature displayed, you need to check the heating bed temperature sensor.
Reheating page
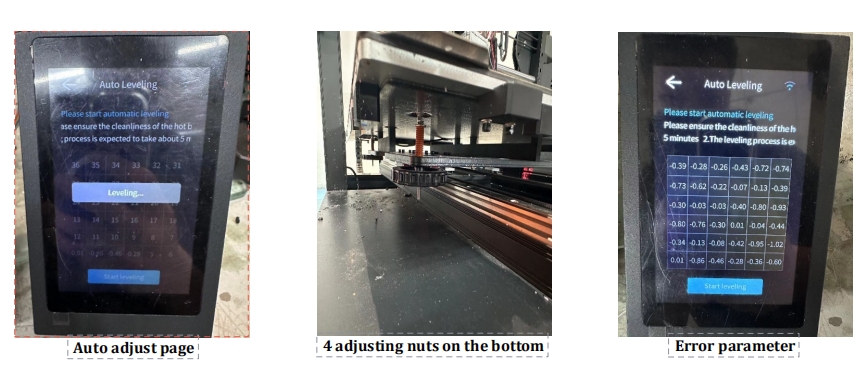
Heating Bed Error was too Large After Automatic Leveling.
Check the error parameters given after automatic leveling and find the areas with larger errors, and the 4 nuts at the bottom of the hot bed can adjust the height. After adjustment perform automatic leveling again to checkif the error reaches the acceptable range.
Check whether the heights on both sides of the X-axis are consistent. First, use measuring tool to measure whether the height forimboth sides of the X-axis to the heating bed is consistent, If it is inconsistent, You need adjust the X-axis on one side (contact the after-sales personnel to obtain the operation video).
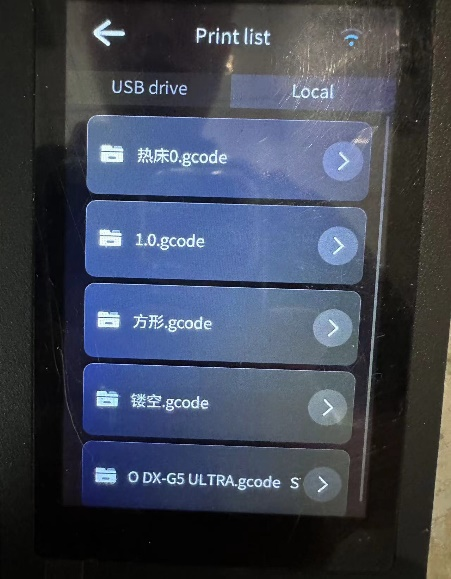
Printing interface hasn't optional file.
Check USB file format;the file format is Gcode;
Reduce USB storage files. You can format the USB system and then import the Gcode file.
Device not working after clicking start
The temperature has not reached the set value. Wait for the nozzle and hot bed temperatures to reach the set parameters;
Format USB system and re-slice file ,Try print again.
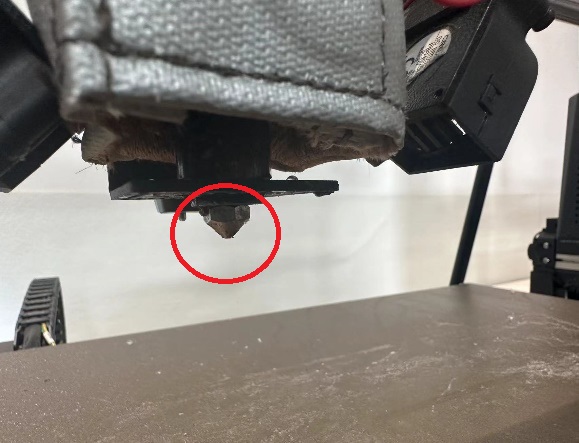
The nozzle does not discharge material after starting printing.
The desired temperature of printing material does not match the actual set temperature. Check whether the nozzle temperature reaches the required temperature of the material;
Pellets too large. Recommended particle size is 2-5mm, The extrudder cannot extrude particles that are too large;
Nozzle clogged. Preheat the nozzle to a temperaturre higher than the required temperature of the material being used and uncl.og the nozzle with needle, If cannot unclogged, The nozzle needs to be replaced;
The regulating fan is not turned on. Fan power can Ibe adjust on the display;
The screw is wrapped in material. First, remove thematerial tube and collect the materials in the machine, After clearing materials, click Move Advance and Reject-Return, then remove the wrapped material and clean it with scissors. If the ejection function cannot eject the wrapped material the extrusion screw needs to be removed and cleaned (cconnect the after-sales personnel to obtain the operation video) ;
Abnormal slicing software setting. First click Move Advance and Retract Feed to check whether the machine can extrude material normally, if the material can be extruded normally manually but not when printing, you need to check the slicking software parameter settings;
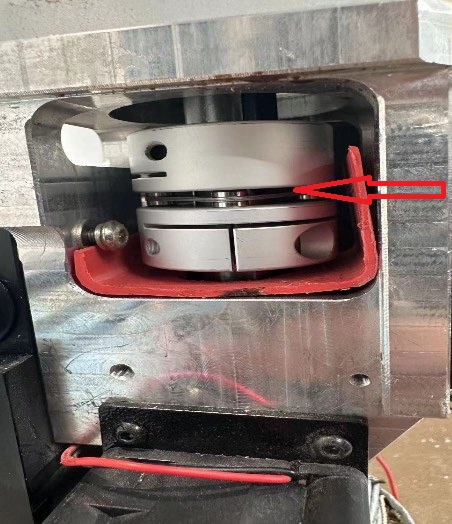
Coupling fastening screws are not tightened.
The bottom layer of the print cannot be pasted or is warped
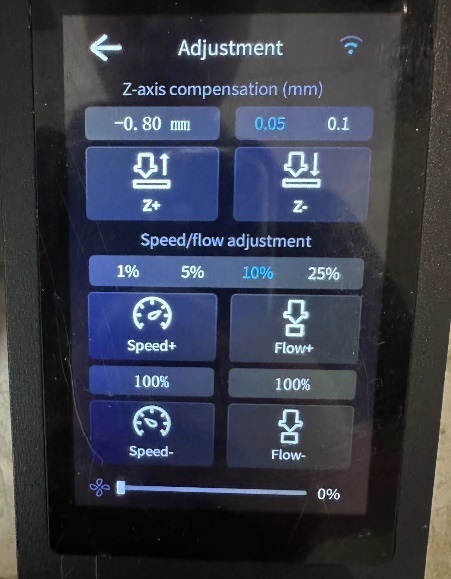
Nozzle is too far from the platform, First check whether the rmachine has been leveled, if the bottom layer cannot be pasted during printing, you can reduce the Z-axis compensation value to increase the moovement of the nozzle and press the material tighter;
Before printing, you can put textured paper on the surface ofthe hot bed to increase adhesion;
Some materials with large shrinkage need to be equippeed with thermal insulation covers to create a constant temperature envirorment;
The bottom layer of printing can be increased to 3-5 layers.When printing the bottom layer, you can appropriately reduce printing speed andturn off the cooling fan.
Print model is misaligned
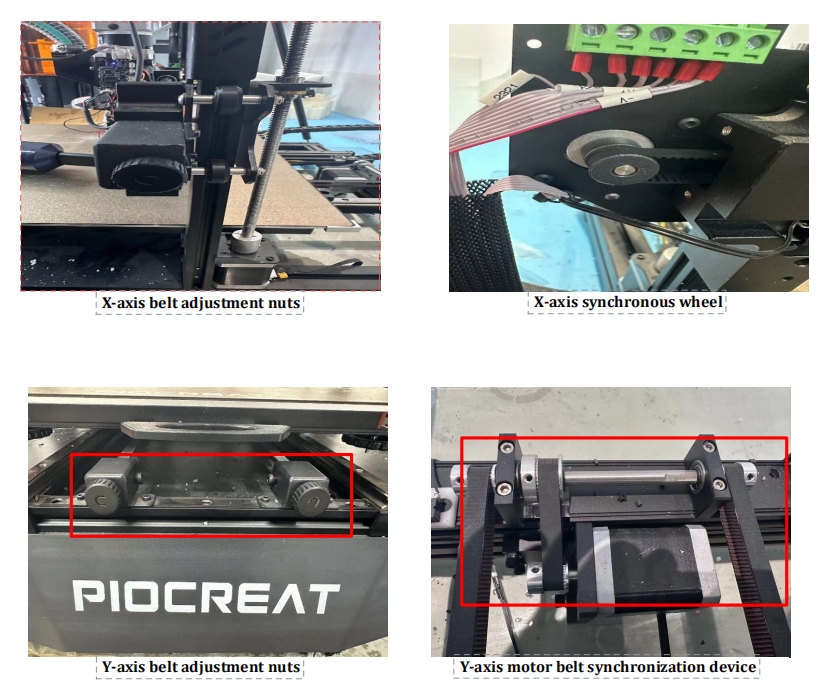
Synchronous wheel screw or synchronous belt loose, Clheck whether the model is misaligned front to back or left and right, if its misalligned , check whether the Y-axis belt and the synchronous wheel screws areloose. If its misaligned left and right, check whether the X-axis belt and the synchronous wheel screws, the belt can be adjusted by rotating the knob in front of the belt, and the screws can be fixed with an Allen wrench;
Nozzle overflow causes layer change to impact the modeI. Observe whether there is excess material agglomeration at the startingpoint when changing layers, if so, it may cause the nozzle to knock the model loose when printing the next layer. In order to avoid this situation, you can reduce the extrusion flow rate, or increase the retractionspeed and retraction amount in the slicing software.
Z-axis motor loses steps. First check whether the height fromboth ends of X-axis to the hot bed is consistent. Adjust the gap between the top roller of the nozzle assembly and the X-axis front panel, then run the Z-axis test file multiple times to see if there is anylag or abnormal noise during the operation. (Contact after-sales staff of the test file)
The slicing software does not set the Z-axis elevationheight, In the slicing software, we need to enable the function of raising the Z-axis when changing layers , and the lifting height must be greater than the layer height.
The surface of the printed model is rough
The material needs to be dried before printing, otherwise it will affect the printing effect.
Too much print extrusion, When printing the initial bottom layer, you need to observe whether there is excess material extruded between the filling lines, if there is , it means that the extrusion flow rate is too large, and you need to reduce extrusion flow rate on the machine;
Nozzle temperature is too high, When changing materialsfor printing, you may forget to modify the temperature parameters on tthe slicing software, Excessive temperature will cause the filament to Ibubble, thus affecting the final printing effect, The temperature can be adjusted on the machine during printing;
The cooling fan is not turn on, Check whether the fan on the side of the nozzle is rotating and whether the display shows that the faris on;
Printed model cracks.
Avoid using mixed materials, Printing can only use one kirnd of material, if different materials are used, the layers may not stick.
The floor height set is too high. The printing layer height should be set to 40% the nozzle diameter, otherwise it will affect the adhesion between layers, Bonding can provide by increasing the overlap betweenlayers.
Increase printing exterior wall circle.
Increase printing temperature, Increasing temperatuire makes the material softer and allows better for bonding between layers.
Printed model deformation.
Z-axis motor loses steps.
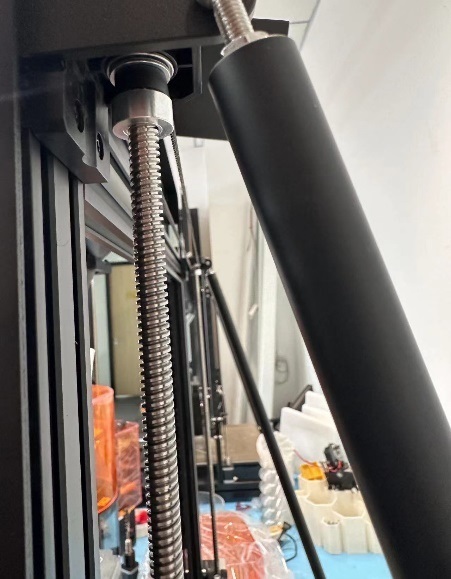
Z-axis belt is loose, You can loose the Z-axis synchronization wheel fixed seat and move it outward, tight the belt and then lock thee fixed seat.
Z-axis screw rod movement stuck, Regularly lubricate thescrew rods on both sides of the Z-axis to ensure smooth movement.
Printing brushing
The retraction distance is too short. Increasing retraction distfance and speed on the slicing software can reduce stringing.
Nozzle temperature is too high, When the nozzle temperatture exceeds the required temperature of the materials, the melted material wi|| fall by itself due to gravity, causing stringing. This phenomenon can be alleviated by lowering the nozzle temperature.
For more information about Piocreat 3D printer, welcome to explore our official website www.piocreat3d.com.